
Photography Basics
A little understanding of the basic fundementals of photography will greatly assit you with low level light photography.
There are three basic elements or 'pillars' of photography.
1. Aperture
2. Shutter Speed
3. ISO
APERTURE
The opening of a lens through which light flows to enter the camera is known as the aperture.
If you think about how your eyes operate, it's a simple notion to grasp. The iris in your eyes get bigger or smaller when you move between bright and dark areas, affecting the size of your pupil.
So, aperture refers to your lens's "pupil" in photography.
It allows more or less light to reach your camera sensor, you can reduce or increase the aperture size, like squinting or opening your eyes wider)
You could compere squinting your eyes to say f/11 and opeing them wide as f/1.8. (it also effects the depth of field)
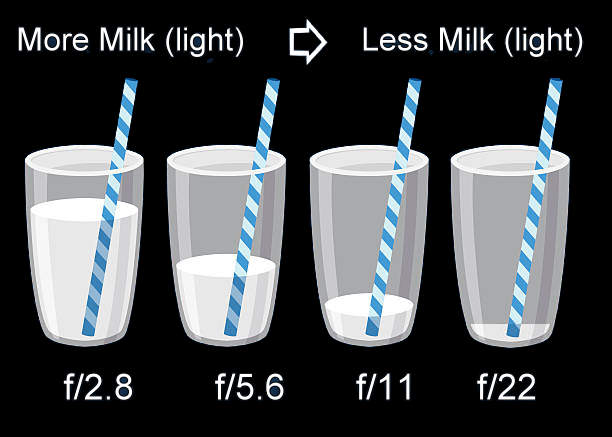
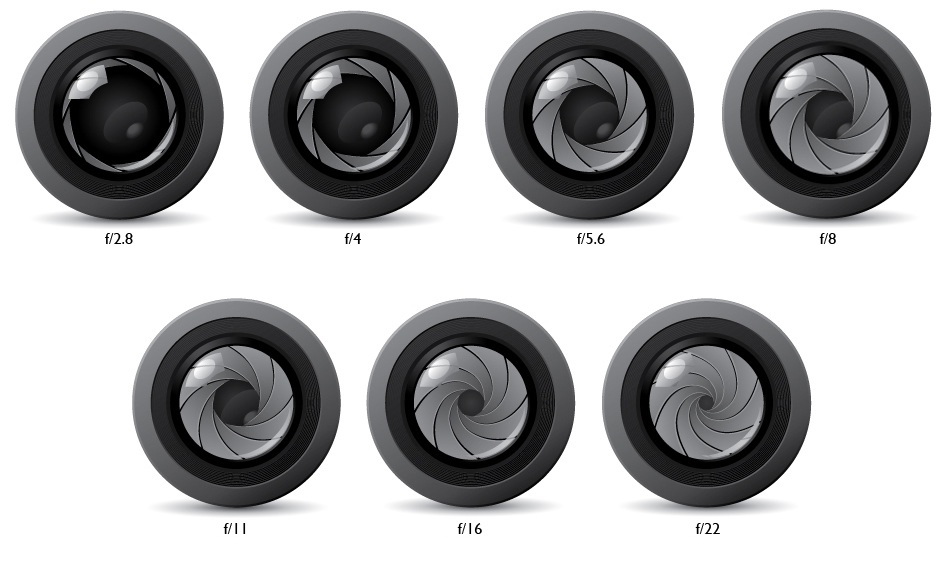
This 'f ' number we refered to is a fraction of the proportion of light you are letting to your sensor via the lens.
It is a little confusing but if you look at it exactly like a fraction it makes sense.
Example: 1/2 (half) a glass of milk is more than a 1/4 (quarter), a 1/4 is more than an 1/8 (eighth) of a glass.
Study the chart below.
f/2.8 is a large aperture (letting in large amount of light), f/22 is s small aperture (letting in asmall amount of light)
So in the dark you would open your eyes wide open to see right?, so open your camera aperture wide too! (f/2.8)
SHUTTER SPEED
Shutter speed controls two things: adjusting the brightness of your photograph and creating dramatic effects by either freezing or blurring motion.
The camera shutter – which is a curtain in front of the camera sensor that remains closed until you press the shutter button to take the photo.
The shutter then opens and fully exposes the camera sensor to the light that has passed through your lens when the camera fires. The shutter closes soon after the sensor has finished gathering light, preventing light from reaching the sensor.
Because it opens and closes the shutter, the button that fires the camera is sometimes known as the "shutter" or "shutter button."
The shutter speed of a camera is the time it takes for the shutter to open and expose light to the sensor. It's basically how long it takes your camera to take a photo. This has a few significant implications for the appearance of your photographs.
When you utilise a long shutter speed (sometimes referred to as a "slow" shutter speed), you expose your sensor for a long time. The first major consequence is motion blur in moving objects and can give a sense of momentum such as vehciles, joggers and moving water.
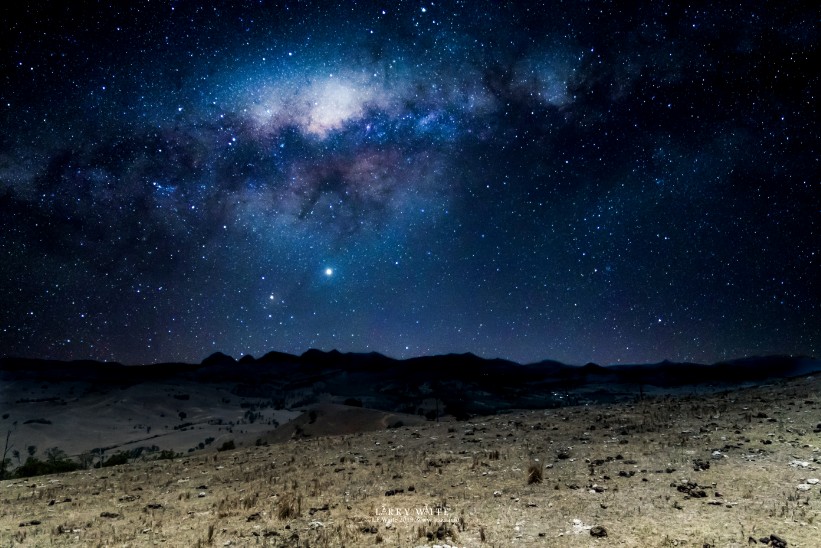
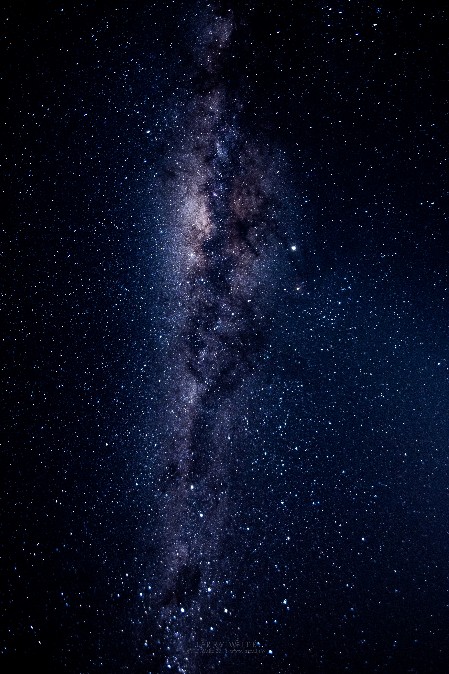
Slow shutter speeds are also utilised with a tripod to shoot the Milky Way or other things at night or in weak light. This is because the slower shutter speed allows more light to the senser. Light being the stars on a dark night.
Excersise 2.
Shutter Speed
Take a photo with a really fast shutter speed of a waterfall, or even a sprinkler. Then take the same shot with a slower shutter speed.
Ensure you use a tripod.
Then at night, again with a tripod, do the same with you camera point up at the night sky.
Compere your shots and you will have a better uderstanding of the effects of shutter speed.
ISO
In the very simpelist form, ISO is a camera setting that brightens or darkens a photo. Your images will get increasingly brighter as you increase the ISO setting. As a result, ISO can assist you in capturing photographs in low-light situations or allowing you to be more flexible with your aperture and shutter speed settings.
Sounds great right? there are however some drawbacks in increasing your ISO.
A photo taken with a high ISO will have a lot of grain, also known as noise. Too much noise and it can ruin the image.
As a result, increasing the ISO to brighten a photo is always a trade-off. Only increase the ISO if you can't brighten the photo with shutter speed or aperture.
In very low light -night sky photography we use a relatively high ISO compared to day time or flash photography. We need a little more light to bring out the stars.
I have shot with ISO 10,000 which is extremely high and it has turned out okay. Other times I have shot with an ISO of 64,000 and it has too much noise/grain and no good.
If there is moonlight keep you ISO somewhere between 1600- 3200. A very dark night with no moonlight you may find you can increase it.